How to Customize Quote Follow-Up Emails & Text Messages
Set the schedule and email text for up to 10 quote follow-ups, add your contact details, and cancel one upcoming follow-up from a quote.
Make quote follow-ups sound like your team. Choose when each email or text message goes out, write a shared default message or tailor individual follow-ups, and include the contact details customers need to take the next step.
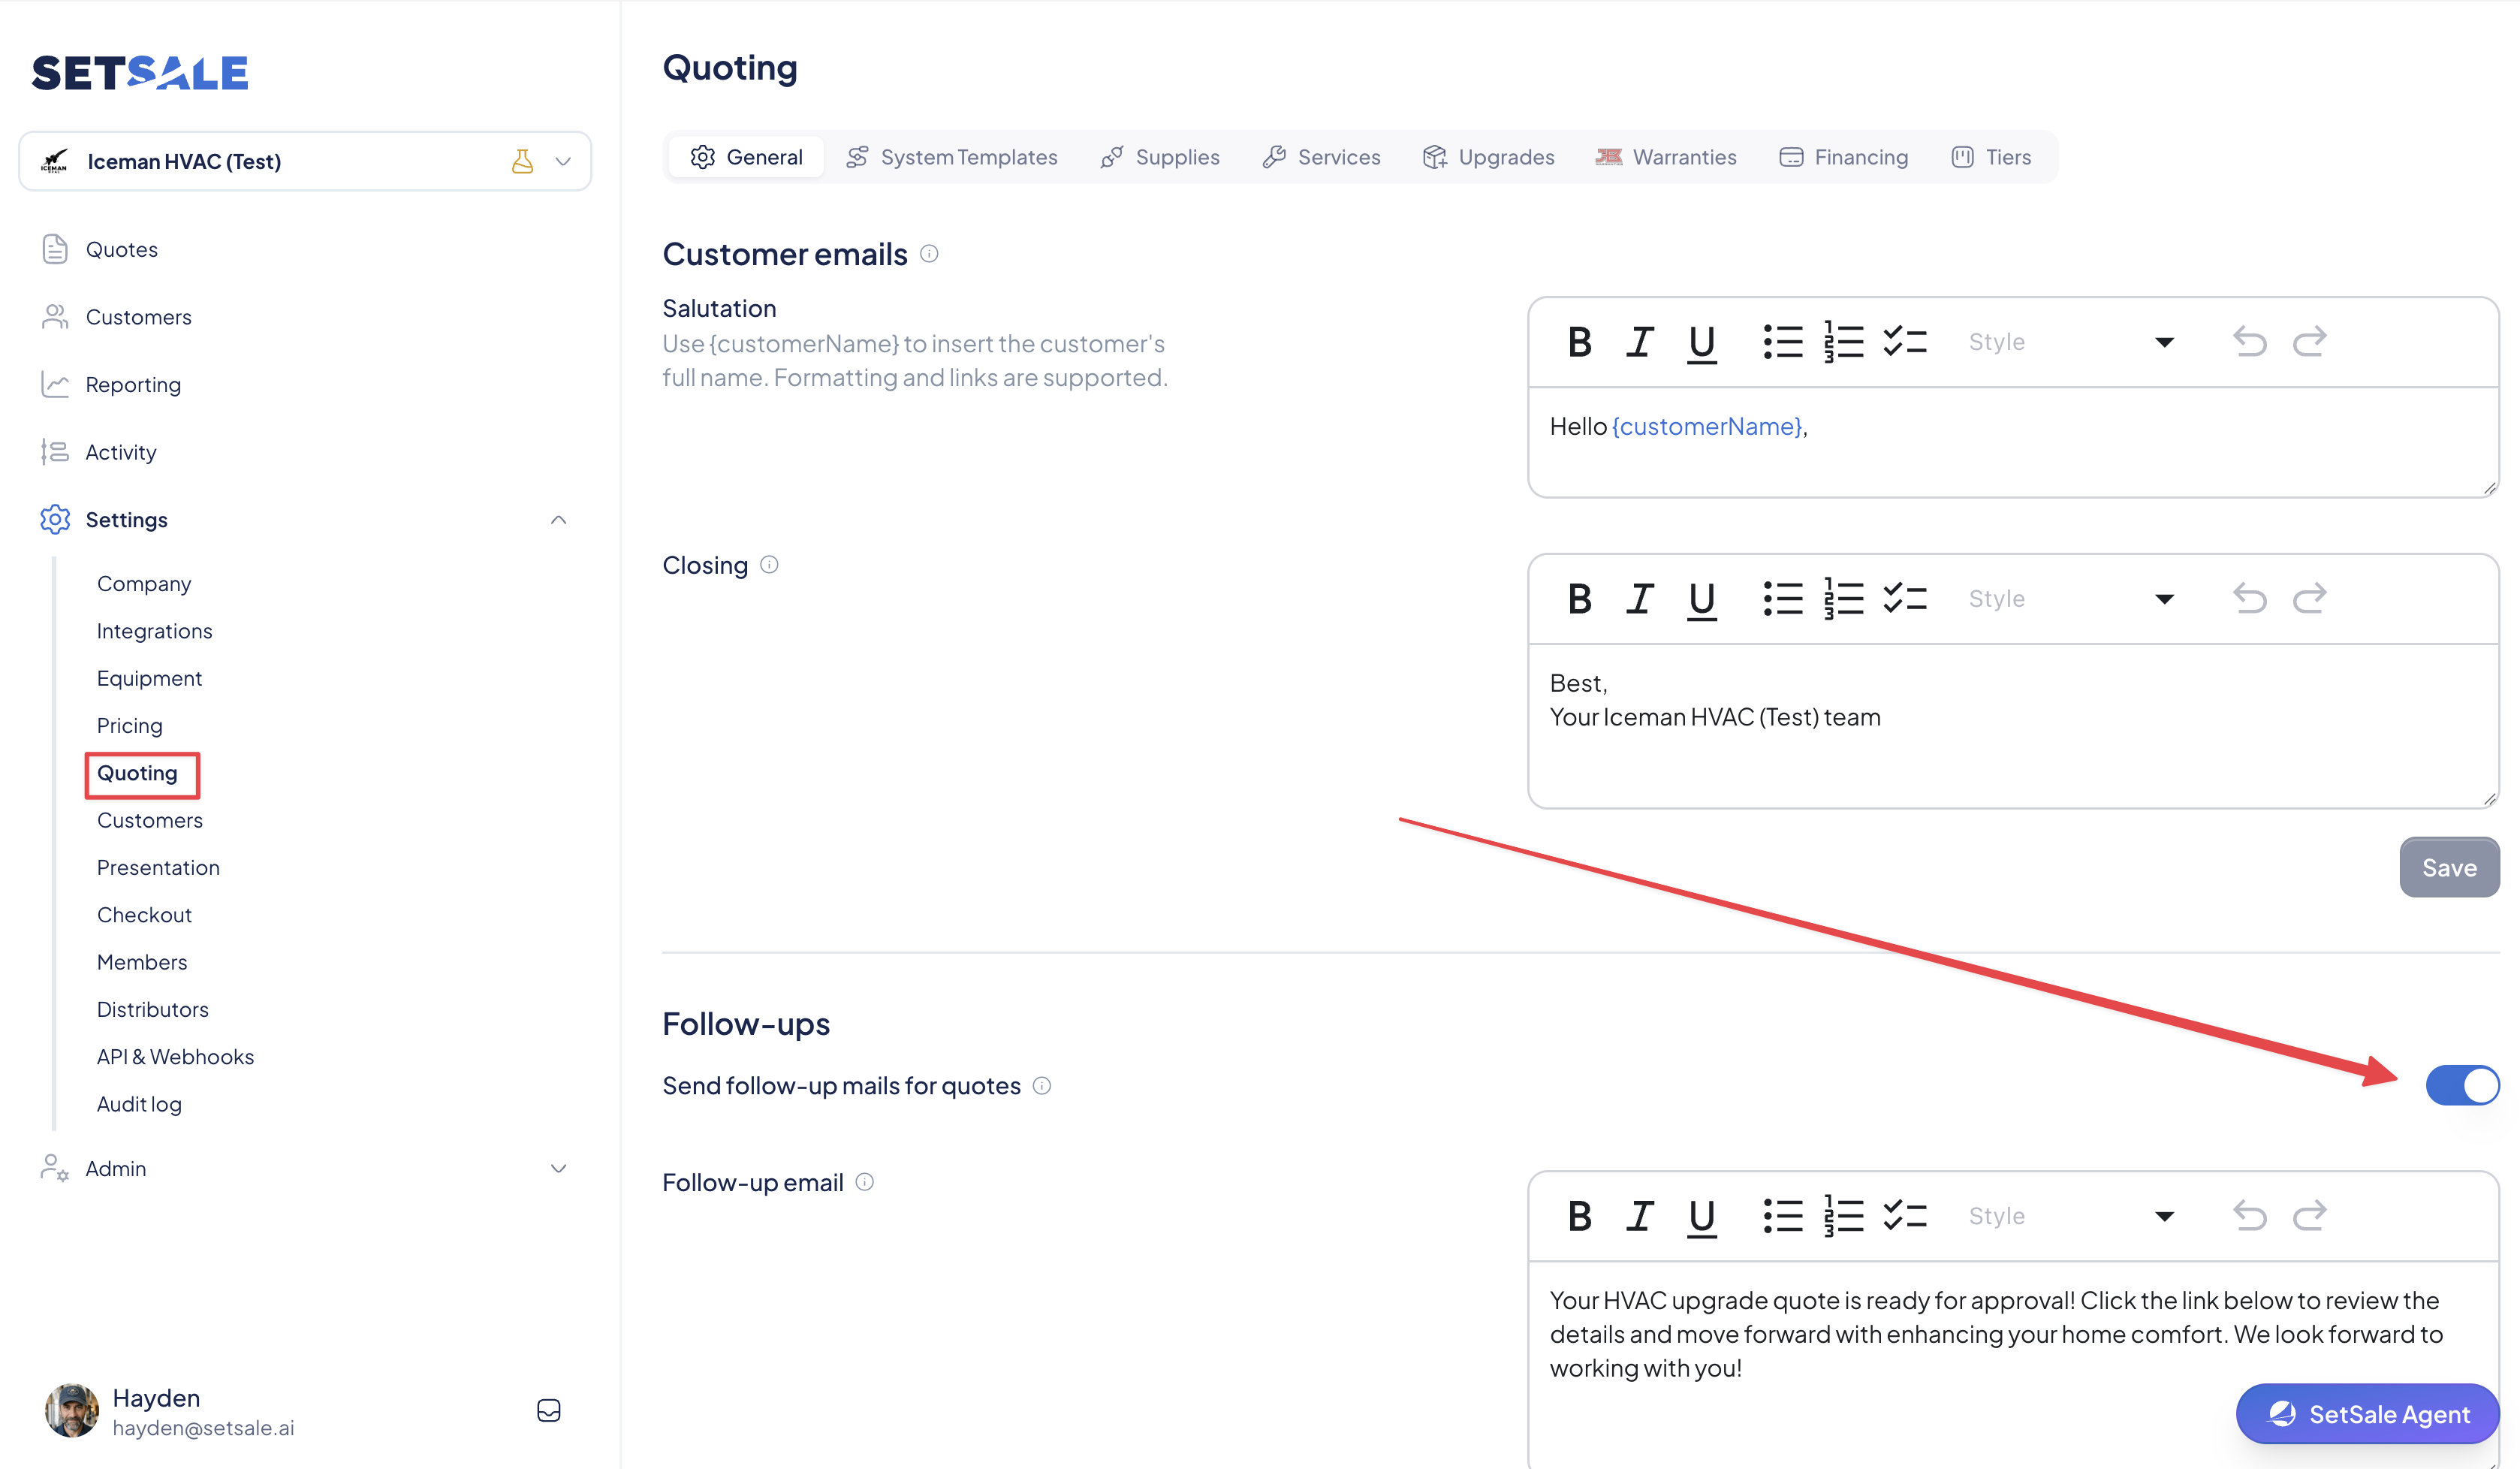
1. Open your follow-up settings
Go to Settings → Quoting → General, then scroll to Follow-ups. Turn on Send follow-up mails for quotes if it is not already enabled.
2. Write your default email and set the schedule
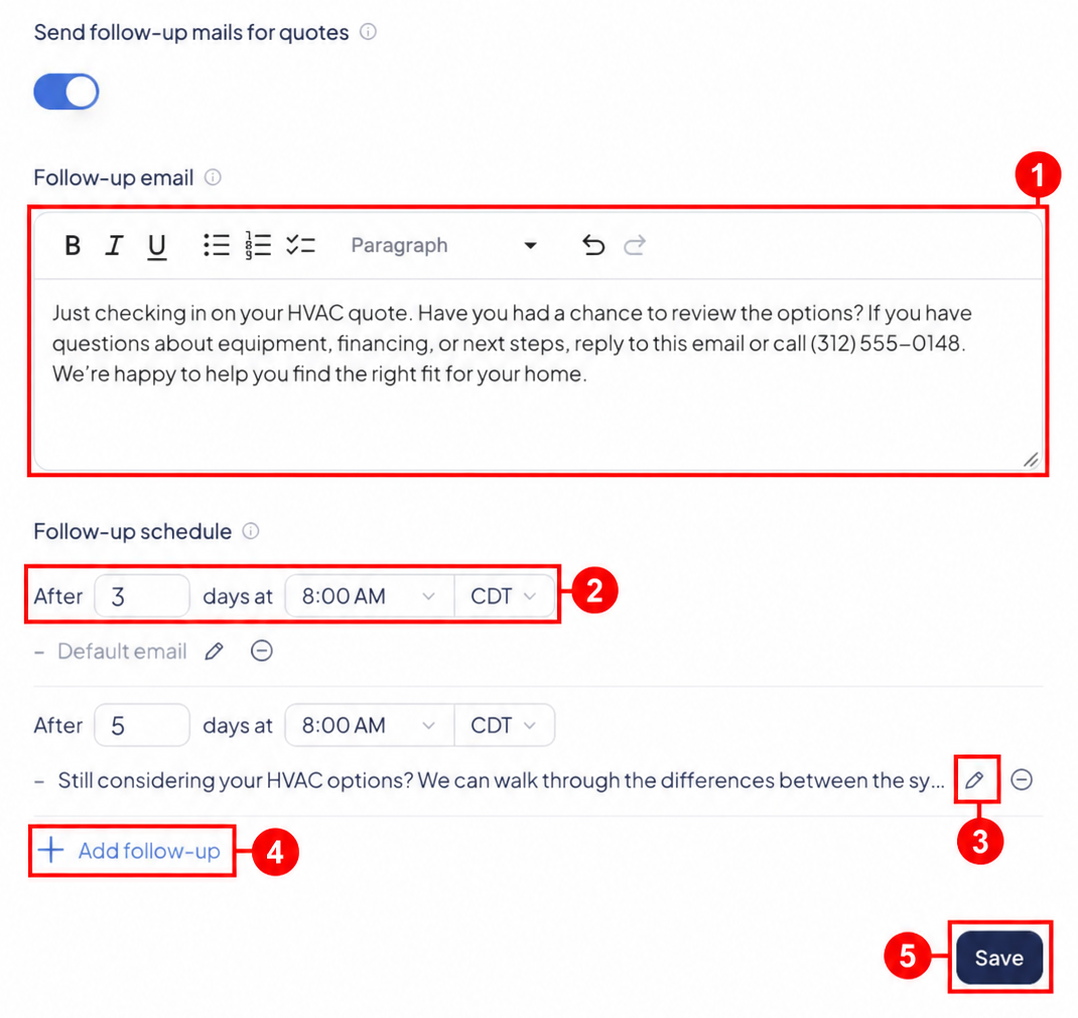
Use the Follow-up email editor for the text you want to reuse. Then set the day, send time, and time zone for each row under Follow-up schedule. You can add up to 10 follow-ups.
The example below uses the default message after 3 days and a custom message after 5 days, both at 8:00 AM in the Chicago time zone (shown as CDT in this screenshot).
- 1 — Default email: write the message used by rows labeled Default email. Add your phone number, website, or signature where you want it to appear.
- 2 — Schedule: choose how many days after the quote was created the email should send, plus its send time and time zone. Each row has its own settings.
- 3 — Individual email: select the pencil icon to give that follow-up its own text.
- 4 — Add follow-up: add another row, up to 10 total. The minus icon removes a row from the company schedule.
- 5 — Save: click Save in the Follow-ups section after making your changes.
3. Customize an individual follow-up
Select the pencil icon beside the follow-up you want to change. In Email text for this follow-up, replace the default text with a message for that stage of the conversation.
For example, keep the first follow-up as a friendly check-in, then use the second to offer help comparing equipment, installation, or financing options.
- 1 — Custom text: write the message for this follow-up only.
- 2 — Reset to default: return this follow-up to the shared default email.
- 3 — Apply: apply your changes in the dialog, then click Save in the Follow-ups section.
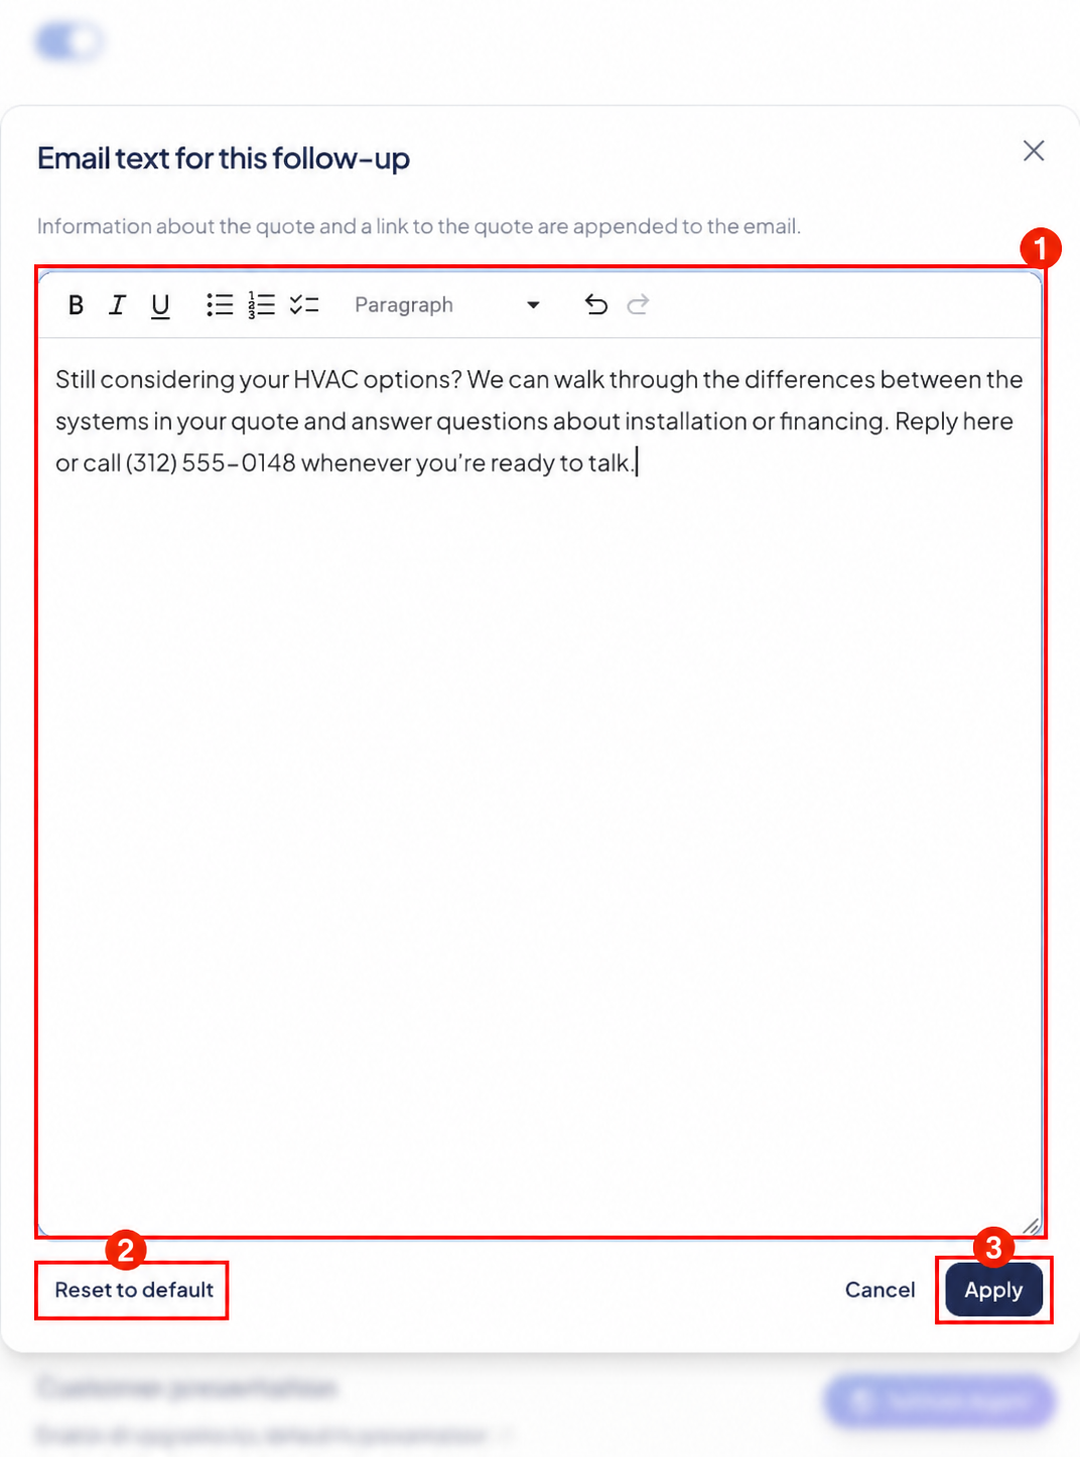
SetSale appends information about the quote and a link to the quote to the email.
4. Add contact details or a signature
Include your phone number, website, or a short signature in the default email, or in any individual follow-up that uses custom text. Use the editor toolbar to format your message and add links.
For example: Questions about your options? Reply to this email or call (312) 555-0148. Replace the example phone number with your own before saving. If you use custom text for a follow-up, make sure that message includes the contact details you want customers to see.
5. Cancel one upcoming follow-up
When you need to skip a single upcoming email, open the quote and find the scheduled follow-up in its Activity section. Use the cancel control for that follow-up.
Canceling one upcoming follow-up leaves the rest of the quote's follow-ups running. Use this when you have already spoken with the homeowner and want to skip the next reminder. You do not need to turn off company follow-ups or remove a row from your company schedule.
Frequently asked questions
Can every follow-up use the same message?
Yes. Write your text in Follow-up email and leave the scheduled rows on Default email.
Can each follow-up use different text?
Yes. Open the pencil icon for each row, write that follow-up's text, choose Apply, then save the Follow-ups section.
How many follow-ups can I schedule?
You can configure up to 10 follow-ups, each with its own day, send time, and time zone.
Do I need to paste the quote link into my message?
No. SetSale appends the quote information and link to the email.